I've always loved all things pickled, except perhaps eggs. Growing up with a mom who has always made everything from scratch, I've been pretty lucky. I am in fact so blessed that I was the girl who went to college and learned from my short lived sorority days that there was such a thing as potatoes, in capsule form, for a bad "chefs" convenience. Now that I am 27 and reverted to back to the pre-teenager stage of thinking my mom is the best thing since homemade sliced bread, I have realized I better learn more of her farm girl bred tricks in the kitchen.
Let's be real, anyone can Google a sauerkraut recipe and cut up some cabbage, but I wanted to do it mom's way. The right way. Mom grows her own cabbage, of course, so the first step making sauerkraut is picking, or rather, sawing the cabbages from the garden. There is something pretty liberating about harvesting your own food from the earth.
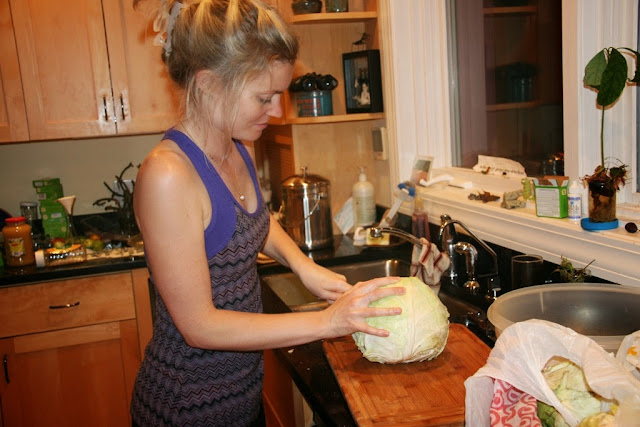
We sawed five or six beautiful cabbages from mom's garden, and she promptly showed me how to clean the heads, by pulling off all of the leaves which were brown, slimy or might contain worms, since after all, we wanted our sauerkraut vegetarian.
The next step, was to chop the cabbage into chunks that would fit into the food processor. I really wanted to do the whole batch by hand, but mom convinced me, in three short seconds to accept the convenience of technology. At least it would be worth it if I could go to bed before midnight.
I chopped the cabbage until the bowl was full, then took it over to the food processor to shred the cabbage in about 1/10 the time it had taken me to chop the bowl full of large pieces. I still preferred the hand chopping to the food processor. Even though tedious, the process was therapeutic and satisfying.
Each time I filled the food processor, I emptied it immediately into the croc, added a generous sprinkle of salt, hand mixed the contents just added with the contents previously added and then pressed the cabbage down while I started on the next batch of shredding. You need to be sure to press each layer of cabbage firmly to the bottom of the croc, once mixed with the former layer. Even the first layer should be pressed down before you begin shredding the second layer, the juices will start to secrete.
Note: I used a 4 gallon croc, identified by the fabulous "4" printed on the side of the croc. Always make sure the croc is clean and dry before starting to fill it.

The croc sits, and starts to ferment, all while you sleep in bed and go on about life. While our house is kept at 78 degrees, the fermentation process could be expedited if the croc spent some time outdoors in the late summer heat. I wasn't in a hurry, and my kraut was ready in about 12 days.
You stir the kraut, thoroughly each day, digging deep down to be thorough. Pick a time of your choice and be consistent daily. My stir time was right before dinner, easy to remember. This regular stirring keeps a layer of scum from growing on the top of the kraut. The process is pretty fun, and very messy. Again, make sure the kraut is covered in a layer of it's own juice before recovering it.
Mom had me taste the kraut nightly when I stirred it to be sure there was enough salt, and to test the kraut to see how the process was coming along. Really knowing when the kraut is done is a personal preference, mom said, "It's done when it tastes good to you!"
Mom always proceeds to can the kraut for storage throughout the year, which is what she ended up doing with her half of the batch. Jack and I decided we wanted to experiment without canning the kraut, therefore, not heating the product and killing off the good bacteria formed during the fermentation process. Some recipes just leave the kraut in the croc, in a basement year round. We decided to put ours in jars and keep them in the fridge, making sure there was a layer of liquid still on top of the cabbage to keep out bacteria. So far, this seems to be working well, other than eating too much of the uncanned kraut really hurts my sensitive teeth, not sure why. We've been putting the sauerkraut on the side of sandwiches a lot, as it's a great compliment!
Let's be real, anyone can Google a sauerkraut recipe and cut up some cabbage, but I wanted to do it mom's way. The right way. Mom grows her own cabbage, of course, so the first step making sauerkraut is picking, or rather, sawing the cabbages from the garden. There is something pretty liberating about harvesting your own food from the earth.
We sawed five or six beautiful cabbages from mom's garden, and she promptly showed me how to clean the heads, by pulling off all of the leaves which were brown, slimy or might contain worms, since after all, we wanted our sauerkraut vegetarian.
The next step, was to chop the cabbage into chunks that would fit into the food processor. I really wanted to do the whole batch by hand, but mom convinced me, in three short seconds to accept the convenience of technology. At least it would be worth it if I could go to bed before midnight.
I chopped the cabbage until the bowl was full, then took it over to the food processor to shred the cabbage in about 1/10 the time it had taken me to chop the bowl full of large pieces. I still preferred the hand chopping to the food processor. Even though tedious, the process was therapeutic and satisfying.
Each time I filled the food processor, I emptied it immediately into the croc, added a generous sprinkle of salt, hand mixed the contents just added with the contents previously added and then pressed the cabbage down while I started on the next batch of shredding. You need to be sure to press each layer of cabbage firmly to the bottom of the croc, once mixed with the former layer. Even the first layer should be pressed down before you begin shredding the second layer, the juices will start to secrete.
Note: I used a 4 gallon croc, identified by the fabulous "4" printed on the side of the croc. Always make sure the croc is clean and dry before starting to fill it.
I was impressed with how quickly the juice started coming out of the kraut in the couple of hours I worked, let alone the first few minutes. The salt is key to preservation, flavor, and helping the juices come out of the cabbage to begin the fermentation process.

Each time I stirred in new cabbage mom told me I should taste the kraut to make sure it was salty enough. I love salt, so I salted with caution as I know mom isn't much of a salt fiend. She actually ended up adding more salt when I was finished the first night. I image there was a good third cup in my nearly 4 gallon croc. Each year's cabbage harvest will have been through different rain and soil conditions from the next year, just as a cabbage's moisture level will vary from patch to patch, so there is no hard and fast rule about how much salt you will need to add.
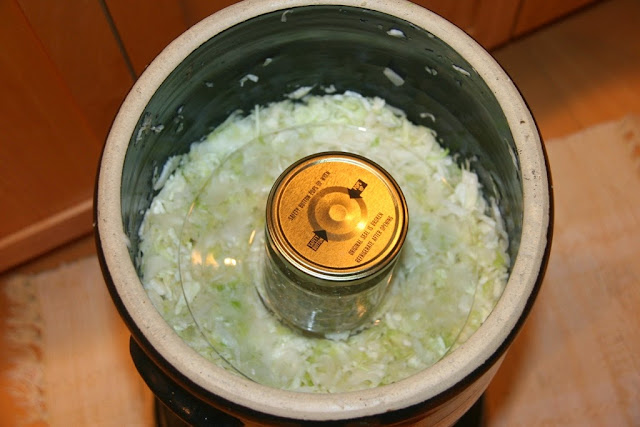
While I believe you can buy croc weights, mom rigs a handmade weight from a clear glass plate, topped with a canning jar, filled with marbles and water. This should be placed on top of the kraut once all the cabbage has been shredded and it's ready for it's first night to keep the kraut pressed. Both plate and jar are sterile, and easily rinsed each night while you are stirring the kraut. The croc is covered with a thin linen cloth to keep the contents clean and fruit fly free.
After the initial night, if the cabbage slaw isn't covered in it's own juice, you will need to add water, purified, chlorine free water to the croc after the evenings stir. The water/juice is necessary as a protective layer keeping away bacteria from the sauerkraut.
Mom had me taste the kraut nightly when I stirred it to be sure there was enough salt, and to test the kraut to see how the process was coming along. Really knowing when the kraut is done is a personal preference, mom said, "It's done when it tastes good to you!"
Mom always proceeds to can the kraut for storage throughout the year, which is what she ended up doing with her half of the batch. Jack and I decided we wanted to experiment without canning the kraut, therefore, not heating the product and killing off the good bacteria formed during the fermentation process. Some recipes just leave the kraut in the croc, in a basement year round. We decided to put ours in jars and keep them in the fridge, making sure there was a layer of liquid still on top of the cabbage to keep out bacteria. So far, this seems to be working well, other than eating too much of the uncanned kraut really hurts my sensitive teeth, not sure why. We've been putting the sauerkraut on the side of sandwiches a lot, as it's a great compliment!
via cooking with a stud, http://www.cookingwithastud.com/2013/10/homemade-sauerkraut.html
Put the internet to work for you.


No comments:
Post a Comment